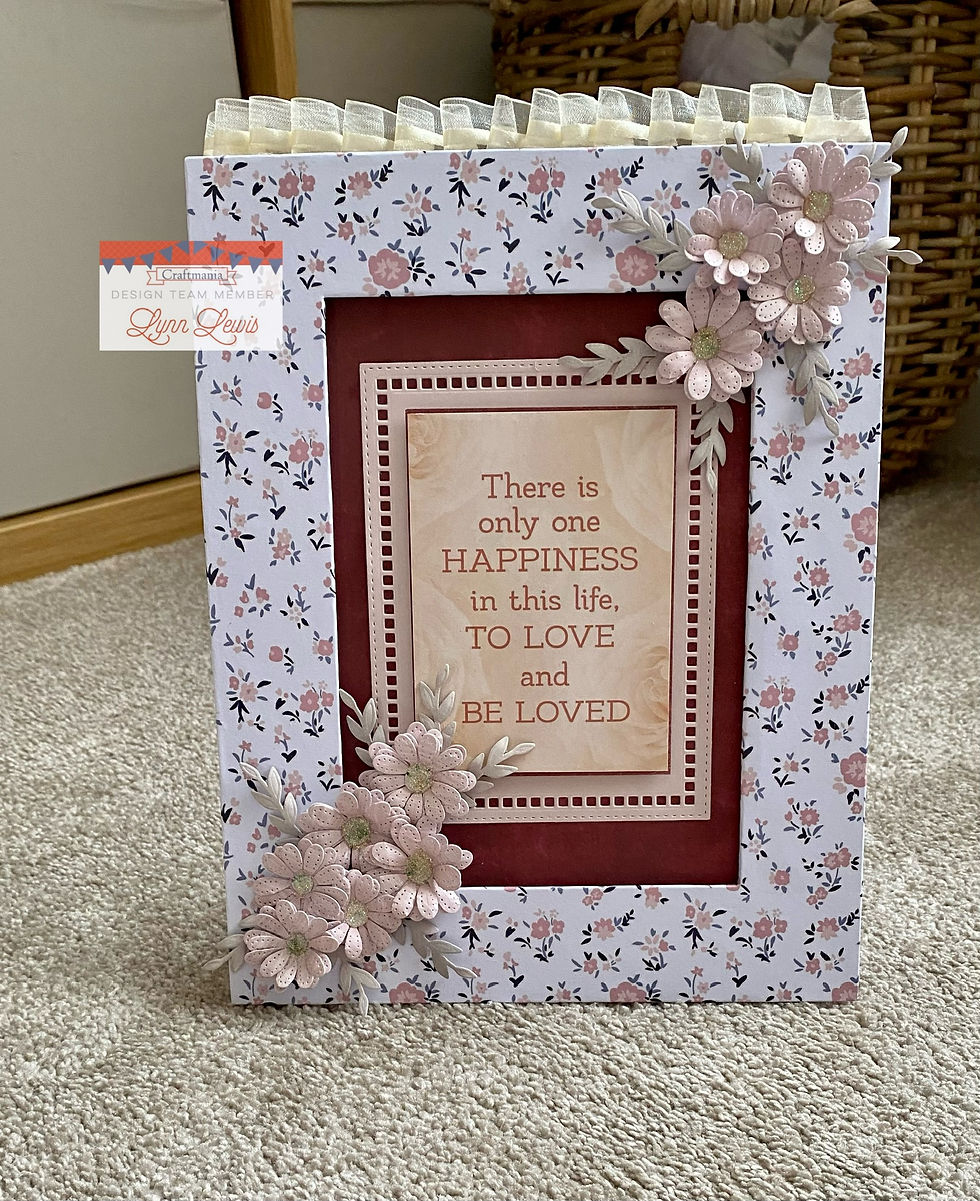
In The Frame ~ Bundle ~ Happiness! By Lynn Lewis
- LYNN LEWIS

- Aug 29, 2023
- 3 min read

Hello Everyone
We all have a relative or friend who doesn't like to put our cards away, because they like looking at them. So this gave me the idea - why not make them a lovely gift of a frame so they can leave it out all year round!
Making picture frames is one of my favourite things to do, and they don’t even have to have pictures in them. It's great fun to create a sort of shabby chic look like this, so read on to find out exactly how to do it!!!
Step 1
▪️For the first step, I painted all the frame backs and stands on both sides with white acrylic paint.
It gives a better surface to work on and adhere things like paper.
Step 2
▪️Select the paper you want to use for around your frame.
I chose 2 identical sheets in order that I could use one side for the frame and the other side for the flowers. I wanted them to match colour wise!
▪️I also chose the other floral sheet because it had a rich dark red distressed back; this is what I used for the backing piece. I covered the back and the stand with odd bits from my scrap box.

Step 3
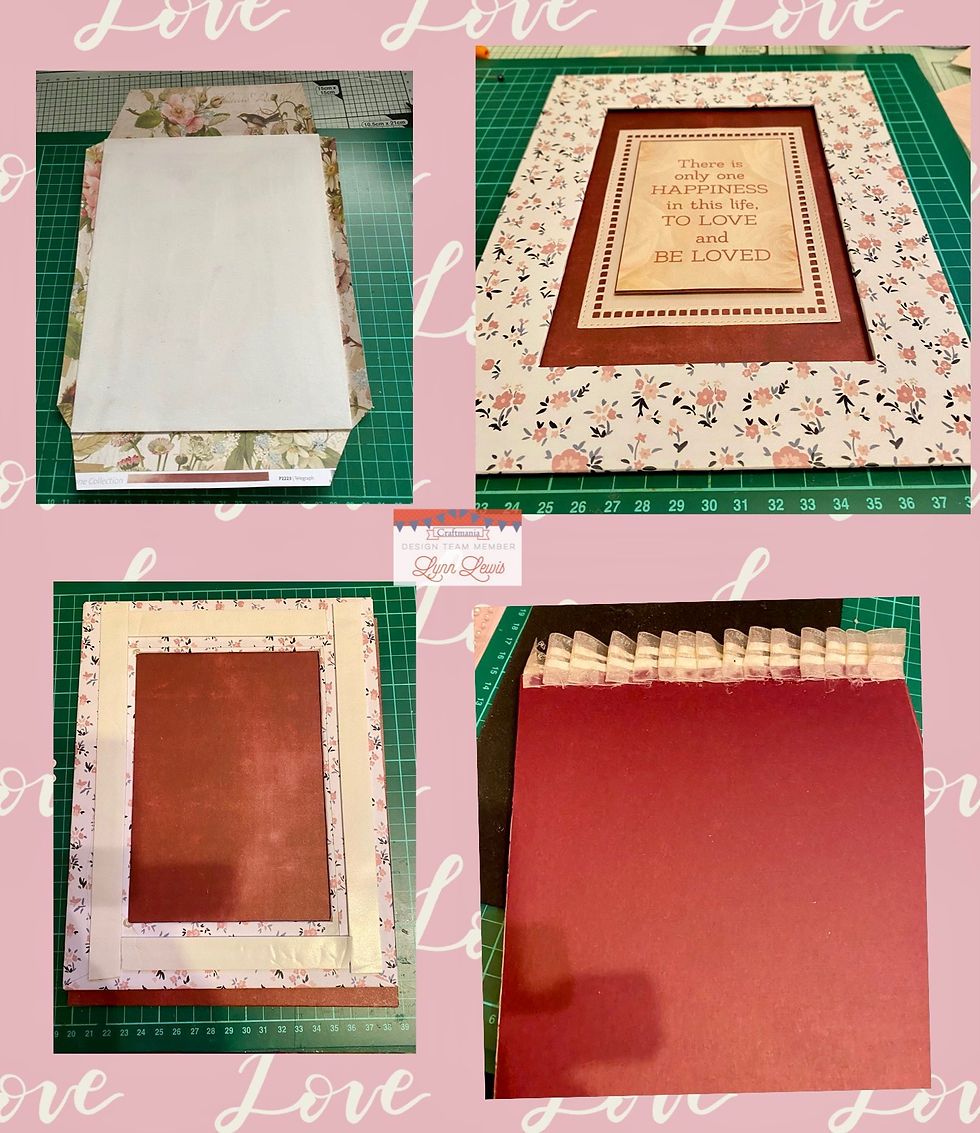
▪️Lay the floral sheet face down and glue all around the front of your frame.
Stick it as squarely as you can onto the sheet of paper.
Push it down to ensure it adheres well!
▪️Then take a craft knife and cut across the middle (as seen in the pictures).
It helps to use a steel edged ruler for this.
▪️Then take the side bits; glue and fold around the frame, placing glue as close to the frame edge as possible, trimming off the extra bits.
✅ TIP - Don’t worry if it’s not completely covered as that side won’t be seen.
Step 4
▪️Take the back piece of the frame set and cover with your distressed dark red sheet and using glue Fold the edges around again, however don’t waste the lovely paper covering all the back - use some scrap card from waste bits.

Step 5
▪️Stick foam roll onto the back of the frame piece.
Now you can either at this point, stick a photo on the back piece, or do as I have done.
Adhere your frame to the back piece.
Step 6
▪️Now with your frame attached, make up the centre piece by cutting out the "Happiness" quote and matting it onto the same paper as the back piece (only so it just shows around the edges) and place foam roll on the back.
▪️Cut out a rectangle using Sue Wilson's Noble Collection - Decorative Squared Rectangles Die Set.
You will also the need the Noble Stitched Rectangle Dies (Set B) to cut around the edges.
I used Foundations Rose Glow Pearl Card and stuck it to the centre of the back piece, before sticking the quote on top.

Step 7
▪️I’m going to squeeze this part in here, because I did this at Step 9 and squashed my flowers.
So to stick the ribbon from the pack onto the back, you can either do it with a Hot Glue Gun like I did, or use Ultra Sticky Red Liner Tape (adding a little glue on top).
▪️It’s pleated as you go; ,try and keep a straight line unlike me who had to pull it up afterwards lol.
I tidied it up by sticking a piece of left over paper on top.
Step 8
Cut out a load of flowers....
▪️I used Jamie Rodgers Pierced Collection Daisy Blossoms - cutting out the flowers from the back side of the floral paper the same as the frame and the leaves from white card.
▪️Make up your flowers (as seen in the pictures) and colour the leaves with Pumice Stone
Distress Oxide Ink. I stuck on the flower centres, but on the reverse side.
Step 9
▪️Stick on the flowers and arrange your foliage as you would like, or as I have done here.
Now I decided I didn’t like the centres I put in, so I added Ranger's Glossy Accents in the centres and sprinkled it with Cosmic Shimmer Diamond Frost for that bit of sparkle
You can still see a bit of the floral pattern in the centre, but I prefer the glitter!
Leave this to one side and dry.
Step 10
Make your stand....
▪️I again just covered this with some spare dark red wine coloured card on both sides, with a little scrap of the floral paper on the top and bottom (as seen).
▪️When the flower centres have dried, glue onto the centre of the back.
And you're finished..... easy as that!!!
I know these projects may look a little daunting, but honestly they're not so just give them a go!
Share and chat with us about them on our Facebook Group - Create With Craftmania And Jamie Rodgers
Hope you've enjoyed this....
Take care
Lynn x

Craftmania Shopping List......
ADD THE BUNDLE HERE
CARD
PRODUCTS
Also Available
CRAFTING TOOLS


Love how you showed of the sentiment , its beautiful