

Design Team - Art Deco Elegance by Ian Rump-Smith
- Ian Rump-Smith
- May 1, 2024
- 3 min read
It's Wednesday again and it is lovely to be back sharing another nugget of inspiration with you all, and the weeks are going so quick it will be summer in no time - Thank goodness.
So I have been over doing the Art Deco the last week but I just love it! The patterns, geometric shapes, colours and oppulent style of this era are just so inspiring.
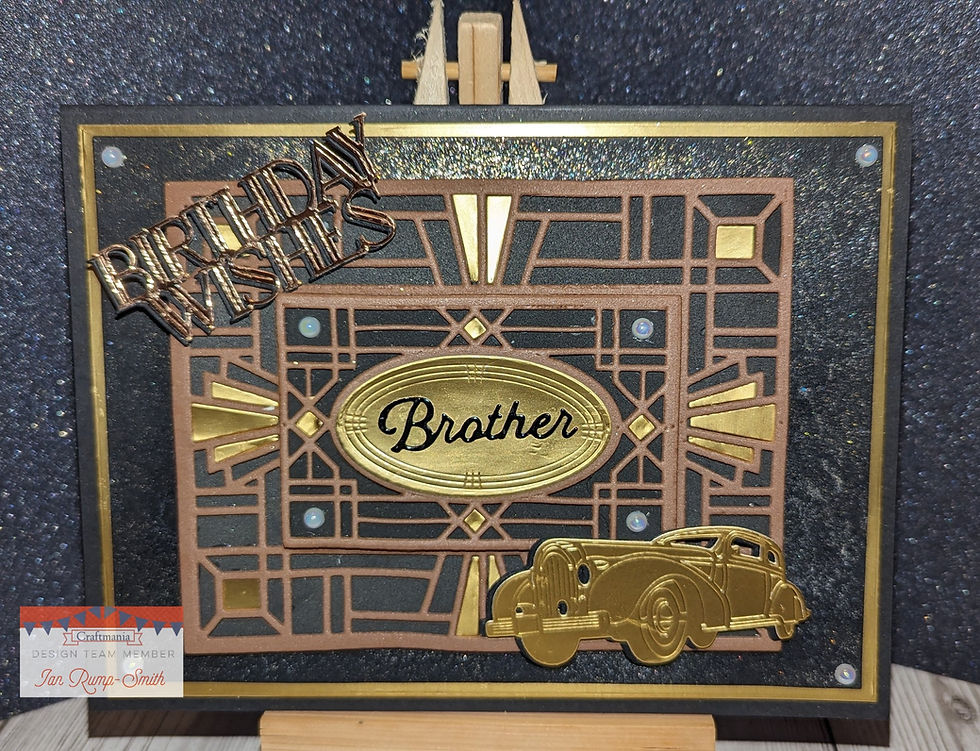
This week's card is for the men and a nice easy make using just 3 elements - Card, Foam and Pixie Powders.
Before we start...
Please Don't forget to take part in our Poll at the end of the post... What is your favourite part of the Art Deco Era...
Step 1
I took a sheet of black card and folded in half using my bone folder.
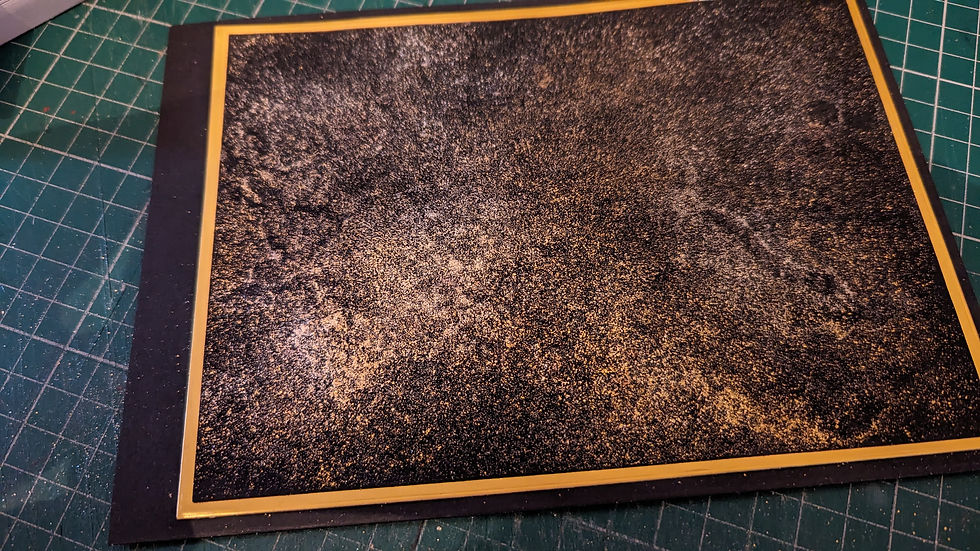
I set this aside and then cut my 2 layers using my Presscut Rectangle die set.
I cut one in a Matt gold and the other in black card.

I took my glass mat and layed my black layer on top and sprayed with my Woodware spray bottle.
Next I tapped my Pixie Powders over the card. I used 3 colours :
Boulevard Lights
Golden Marble
Frozen Pearl
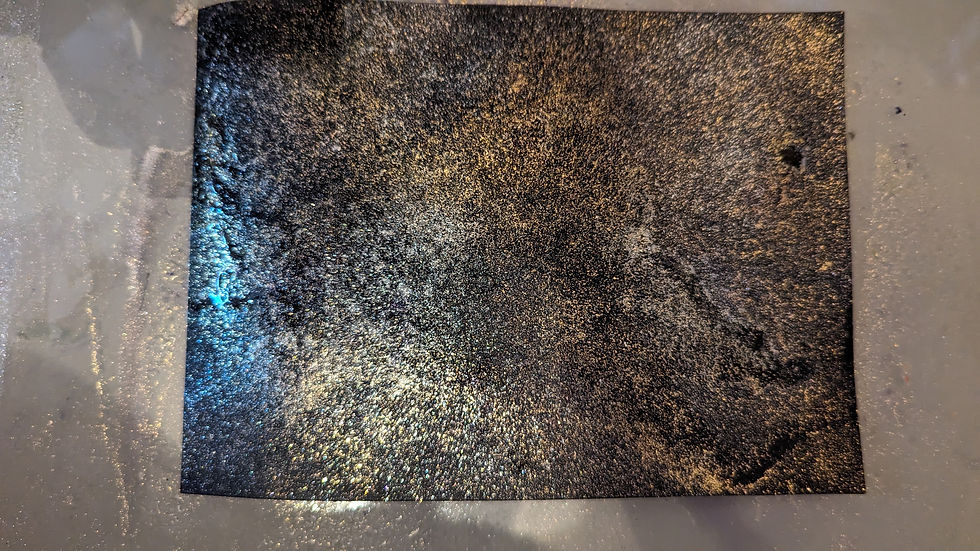
I let the powders do their work and moved my card a little to cover any blank areas. I used my heat tool to dry my design and then using double sided tape I attached to the gold layer. I then glued this to to my card base and cut off the excess piece at the end.
Step 2
Using the Oval Frame Art Deco die set I cut my pieces from Brown and Black Funky Foam. The foam cuts so easy and looks great once cut. I cut the oval middle from Matt Gold card.
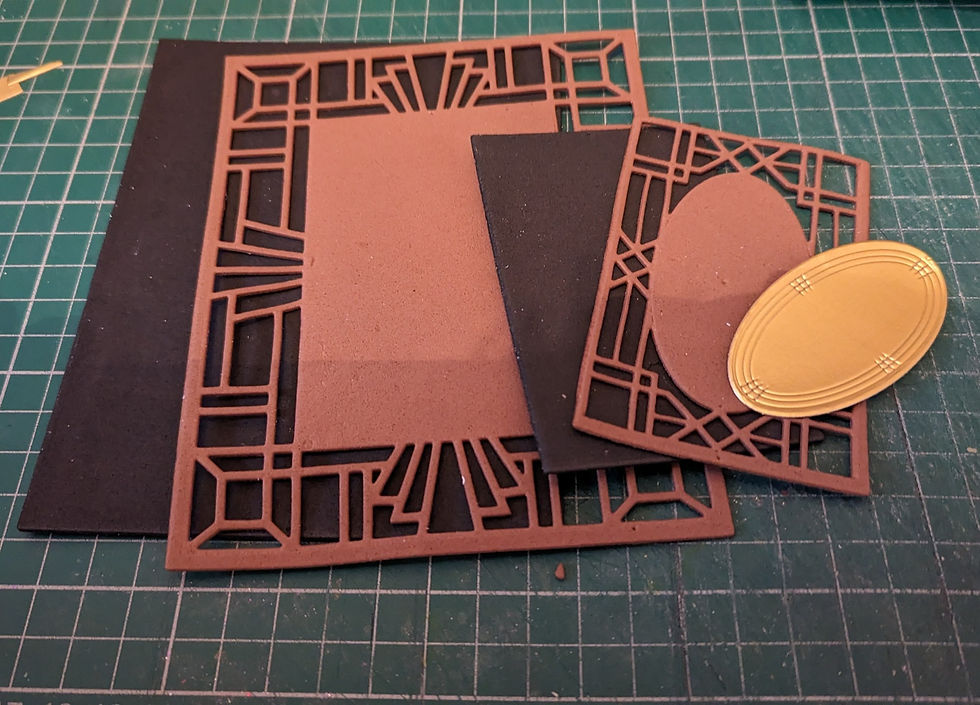
I used a wet glue and put my pieces together carefully.
As I looked at the design I thought it needs a little something else, so I cut some small pieces from the gold card left overs and stuck them into the foam frames.

Step 3
Next I glued my frames to my card base and then cut out my last few pieces.
I used Jamie Rodgers - Male Relations die set and cut 'Brother' out of Black Mirri card. Of course any of the other sentiments can be used to fit the recipient
I glued this onto the oval on the top frame.
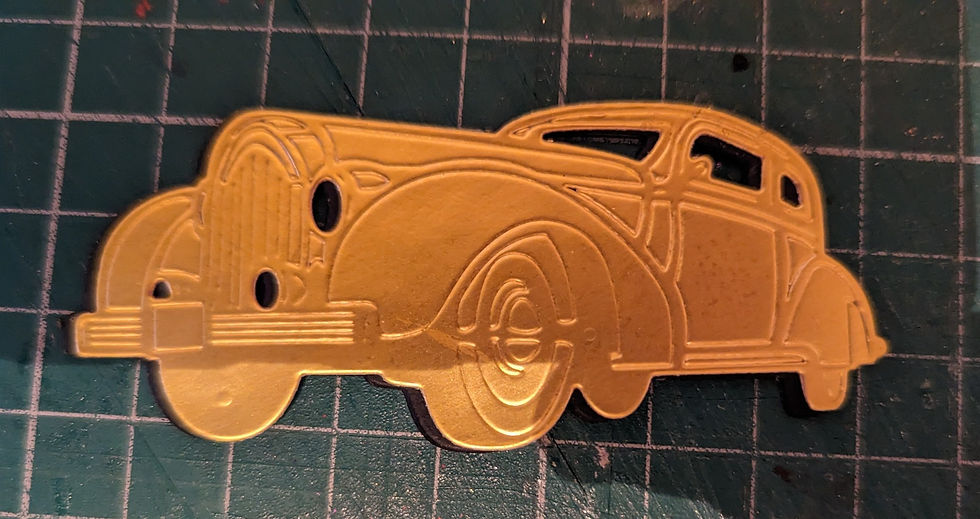
The car was from the Travel in Style Art Deco set and I cut 3 in black and 1 in Matt Gold.
I slightly offset the gold piece.
The sentiment 'Birthday Wishes' was also from the Art Deco Range and I cut one in black and one in Rose Gold Mirri, and again offset it slightly. I glued this onto my card front.
I finished my card with some pearls as these are subtle enough for a male card.

Hope you like my card and please share with us all on the Facebook group if you create a project that has taken inspiration from my project, I would love to see it!
Thanks for checking out my blog and I hope to see you all again soon for my next creation.
Have a nice week and take care
Ian x
Shopping list
Other Options -
Option..
SPECIAL OFFER
R.R.P£8.99 - Offer Price £5.99
We would love to know....
What is your favourite part of the Art Deco Era...
The Fashion
The Cars
The Buildings
The Colour Schemes
You can vote for more than one answer.


Comments