

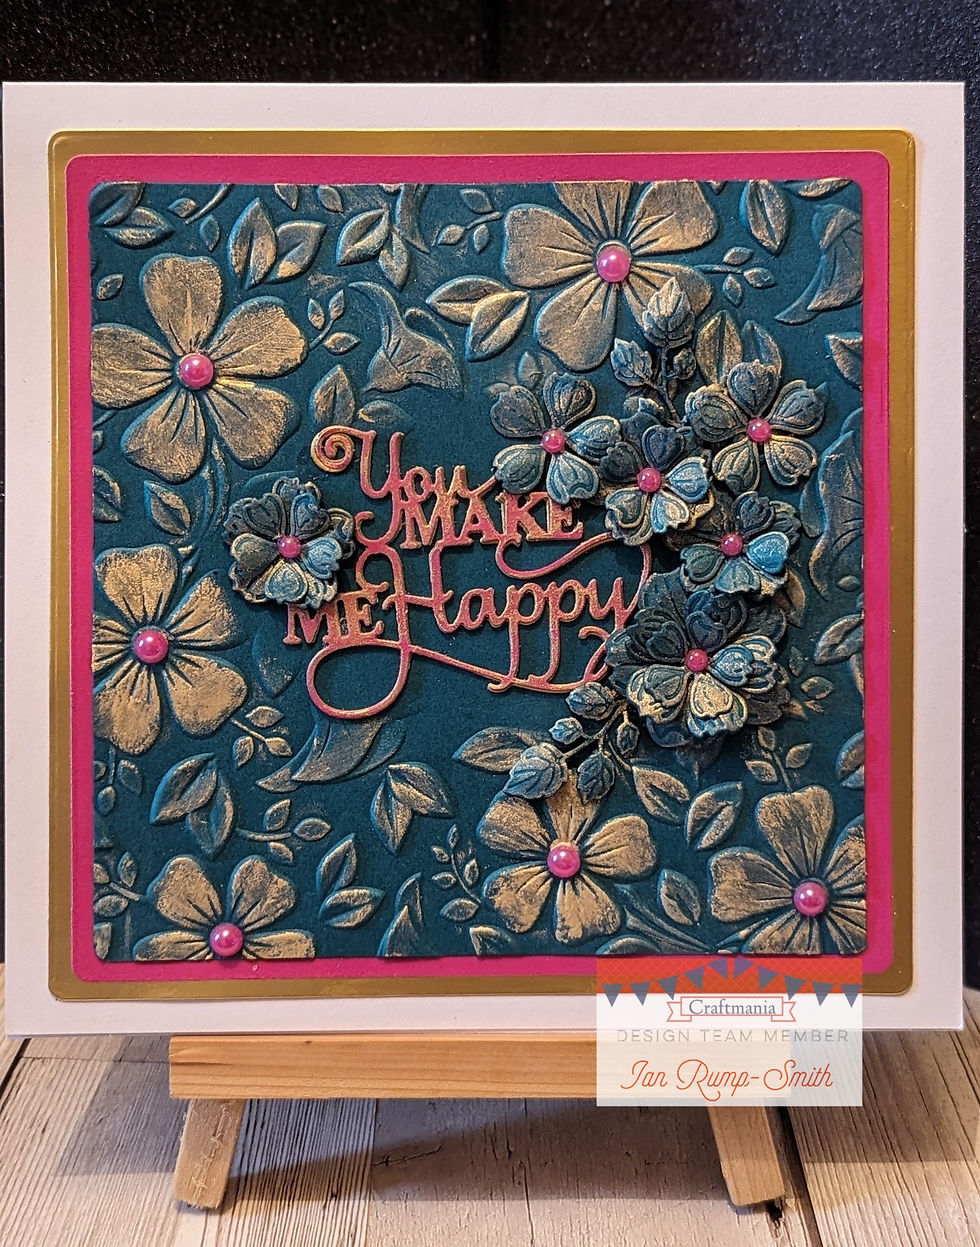
Garden of Happiness by Ian Rump-Smith
- Ian Rump-Smith
- Mar 6, 2024
- 2 min read

Welcome to my weekly blog, crafter's, and WOW have I got a new game changer product to show you.
If you have already watched Jamie video using the said product, then you guys will have been purchasing this new product.
Let me show you what I am rambling on about.
Step 1
Take a 7 x 7 card base and we will use it as a tent fold card.
Next, using the Noble - Round Corner Square dies, I cut my mat and layers.
Large Mat - Gold Matt card
Medium Mat - Dark Pink Dovecraft Card
Small Mat - Foundation Card Petrol Blue
Step 2
Taking the top layer and the Nellie Snellen Flowers 3 embossing folder.
I put my card into the folder and then I took (🥁drum roll please) the square oval cut out diffuser plate and secured to the back of my folder using low tack tape.
This will emboss all the card except for where the oval is cut out.

Now depending on your embossing machine, you will need to check here ... the instructions given on the product description for your machines stack (instructions).
Once embossed it opens many possibilities....💡

Step 3
I wanted to add some colour to my embossed card so I took my pot of Cosmic Shimmer Golden Glow - Opal Pearl Gilding Polish and using my finger, gently rubbed over the large flowers. Once I had done this I did the same over the other embossed areas, but not as strong in colour as the flowers as I wanted them to stand out more.
I used a piece of kitchen roll to rub over the entire piece, to polish and also pick up any little thick pieces.

I just love how this looks, that soft fade to the centre.
Step 4
Using the Petrol Blue card I cut some of the flowers and leaves from the CE Everlasting Love Collection Rose Blossoms, and added some of the gilding polish to them too.

I added some dimension by using my foam mat and embossing tools and then glued them together.
Step 5
Next I glued my Mats to my card base.
Step 6
Finally, I cut out my sentiment, 3 times in gold Matt and one in dark pink. I used a little of the gilding polish on the pink as this is the top layer.
I glued all layers together and chose to do this as it gives nice depth to the centre of the card.
After gluing to the centre part of the embossed card, I glued my flowers and leaves around the sentiment.
As a finishing touch I added a few pearls to match my pink layer & sentiment
I hope you enjoyed my blog and remember this design can be in your choice of colours and have fun with the diffuser plates, I did!
Join me next week and have a lovely rest of the week.
Ian x Craftmania Shopping List. Diffuser Plates -
Embossing Folder -
Opal Polish -
Petrol Card -
Pink Card -
Sentiment -
Flower Die -
Rounded Corner Noble Dies -


Comments