

Nellie Snellen Design Team Spotlight ~ The Desert By Lynn Lewis
- LYNN LEWIS

- Jul 7, 2023
- 3 min read

Well hello Crafters....
Hope you’re all fine and dandy, and raring to go with the next Design Team Spotlight project?
The stamp I'm using today from Nellie Snellen's Collection is called The Desert and is part of the slimline stamps available. It is quite a wide stamp, so I've decided to use
Jamie Rodgers' Vintage Textured Pastel Paper Pad for the background. I love that you can still see the paper pattern through the colours.
▪️Take your stamp and paper to your Stamping Platform and use a Make Art Ink Pad in Fern Green and Tiger Lily to stamp out your image. Use Tiger Lily for the sun and Fern Green for the terrain.
See my photos below.

▪️Next, use the following Make Art Ink Pads to colour in your image - use a water brush and a blending mat.
1️⃣ Acorn
2️⃣ Tiger Lily
3️⃣ Prickly Pear
4️⃣ Sunflower
5️⃣ Leaf Green
6️⃣ Fern Green
7️⃣ Pink Peony
8️⃣ Cactus Flower
9️⃣ Sky Blue
✅ TIP - I always stamp out a couple of images, just in case I make a mistake and to save time.
Once you’re happy with your image, cut across the two and keep the one you're using and set aside.
▪️Now I didn’t want it to just look like a stamp which was coloured in and stuck on a piece of card, so I looked through my slimline dies and found the perfect option to make three pictures stand out from the one stamp.
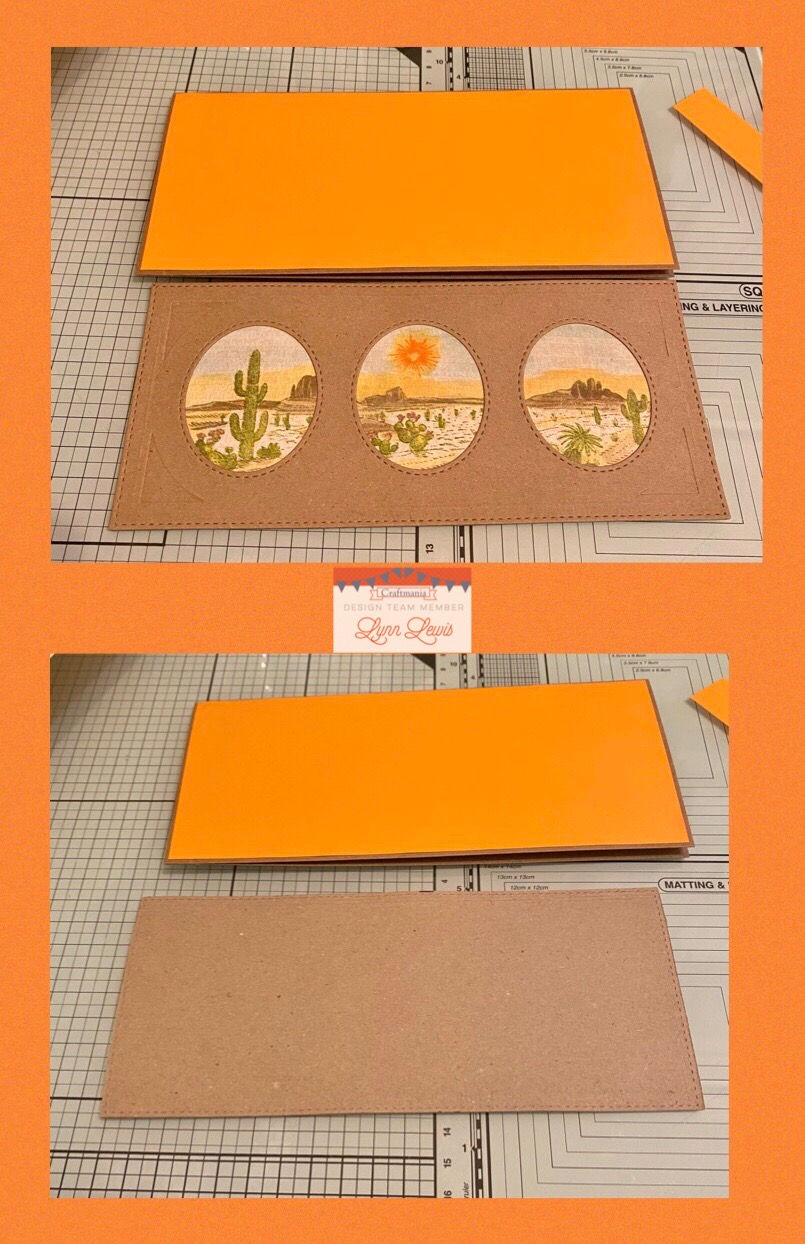
▪️Take a sheet of Kraft Card and using Sue Wilson's Slimline Stitched Rectangles and the Stitched Oval Aperture Trio Die, cut out one of the trio and one rectangle that fits the trio.
▪️Next, cut a piece of Orange Maya Card to mat behind the 'stitched rectangle.'
For your card base, make a slimline card from an A4 sheet of Kraft card.
▪️Take the card and mat the orange piece you've just cut onto it.
Now take your stamped image and place this behind the stitched ovals of the aperture trio (centring it).
Look at mine as a guide if that' helps :-)
▪️Stick it down and trim around the areas where you don’t want paper showing.
Then take the stitched rectangle and adhere that behind, so that it gives it a bit of body.
Now glue this onto the orange card background.
You have the option to either leave it like that, or you can do as I have done, and just add a couple of little decorations.....
▪️I cut out a couple of the 'bendy' leaves from the Wings Of Wonder Collection - Cherry Blossom Die Set, and coloured these with Peeled Paint Distress Oxide Ink.
🔹 I also used a few of the butterflies from the Wings Of Wonder Collection that I had already cut out. These were coloured with Distress Oxide Inks - Squeezed Lemonade and Carved Pumpkin.
▪️I chose my "Happy Birthday" sentiment from Jamie Rodgers' Sentiments Collection - Essentials 2 Set. I cut this out three times in Orange Maya Card and glued these on top of each other to give definition!
▪️To finish.....glue down the leaves around the outer ovals of the card, adding the layered butterflies on the end of the stems and sticking down your sentiment in the centre bottom of the card.
And there you are... thinking out of the box with stamping :-)
Thank you as always for your lovely comments, they really do mean the world to us....
Happy crafting and share your makes with us on our Facebook Group - Create With Craftmania And Jamie Rodgers.
Best wishes, Lynn x
Craftmania Shopping List.....
Also Available
CARD & PAPER PADS
OR
INKS
GLUES & ADHESIVES
CRAFTING TOOLS
Also Available


Love how you have made it look like 3 pictures , love the colours to . Great card for those men in your family. X