

Wrapped Up Ready ~ By Jamie Rodgers
- Jamie Rodgers

- Apr 17, 2023
- 3 min read
Updated: Aug 26, 2023
Ok, I am in a proper festive mood!

So today we are going to be talking about this little creation....

So let's get started!..

- Let's stamp the main Tea Bag stamp from this set on to Coconut White card, we will be heat embossing it in Gold Detail Embossing powder, so it may well be worth rubbing over your card with an anti static pad first.

I have just discovered stamping in Tea Dye Oxide Ink, I find it gives a lovely shade to the embossing powder, is easy to see and gives a nice effect.
Pop on your Detail Gold Embossing Powder and give it a heat with your heat tool.. I have repeated this for a second time so I have two panels to die cut from.
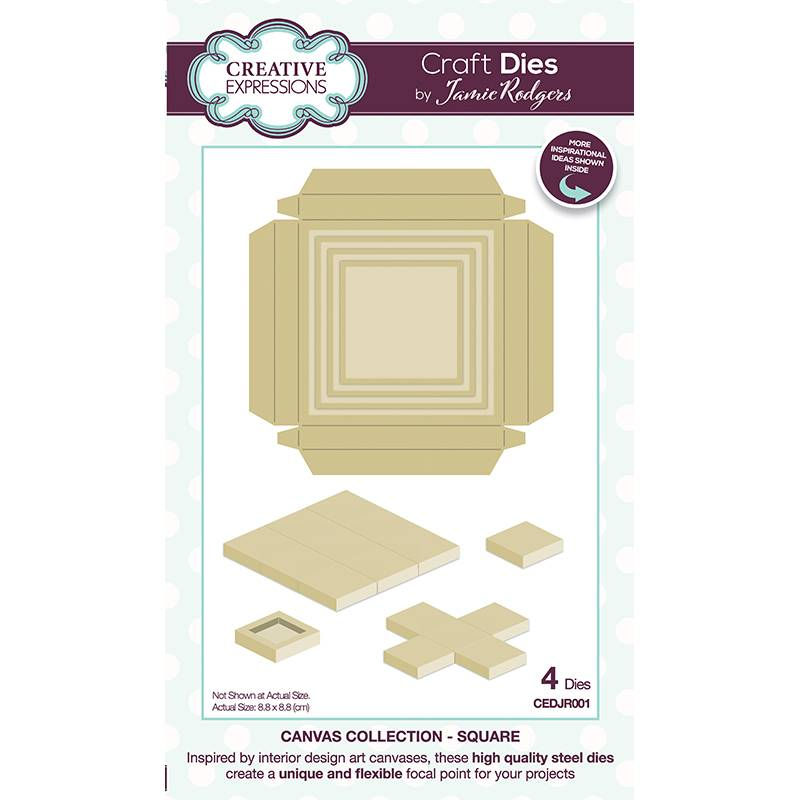
- Now line up your LARGE & SMALL (Original) Sqaure Canvas Dies on to the panels and cut them out, using the score lines provided burnish the folds and build up your canvas so it is a solid box.
You may wonder why we didn't stamp the images once the cuts had been done, personally, I find it easier to line the die up on top of the stamped image and if you stamp them once cut, it is rather difficult to stamp within the valley of the score line.

- So confession time... when i started this project I thought I would go with an elegant Coconut White & Gold colour scheme and was happily working in that direction....until the flood gates flew open and a cup of tea come my way... attacking my already built canvases! So with me not being one to bin a thing! (Border line hoarder here!) I decided I would try to add some colour and see if it covered the tea stains..

I actually really liked how these looked and felt the bow would hide any obvious markings.. so suddleny we were on a slightly more classic colour scheme...
- Next up stamp the frame from the stamp set, once again... Coconut white card, Tea Dye Ink Pad, Detail gold Embossing Powder - Don't foget the anti static pad!
- Trim around the outside edge, I used a knife to remove the middle from the panel, you may well be able to use a nesting die for both/either if you prefer.
- Pop some foam tape around the frame ready..
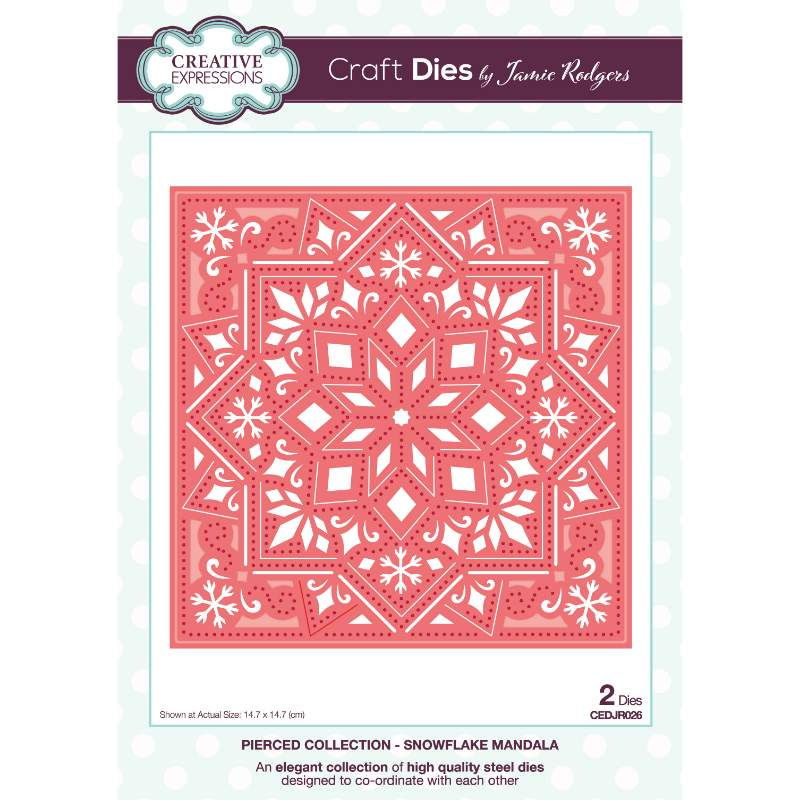
- On to the next stage... the delicate background! grab your piercing die..
And cut this from a piece of coconut white card.
- Stick this flat on to another piece of coconut white card and then trim it down to be a 6.75"x6.75" Panel (this could have less of an outside frame if you prefer to make smaller cards).

- Next up, pop on the frame we had already prepared.
- Layer this on to a piece of Coconut White card that has been coloured around the edge with the Evergreen Bough Distress Oxide Ink - 7" x 7" I foam padded mine for a little more height. - Layer this on to a piece of Antique Gold Pearl Card cut to 7.25" x 7.25" I once again bought in the foam pads!
- Last layer... to match in the red, cut another piece of Coconut White card 7.5" x 7.5" and colour around the edges with the Festive Berries Oxide Ink
- Back to the Canvases...
✅ TIP - When it comes to putting them on the card.. I tend to double stack foam tape in the middle of mine to give them more stability..
So I have taken the smaller one and glued around the edge and foam paded the middle, and added it on top of the larger green canvas
- Add your foam tape under the Green Canvas, then find some ribbon and wrap the stacked presents with a little bow on top.
- Attach this on to the middle of your card.

- Stamp the sentiment of your choice, mine come from this stamp set..
I have stamped it in Tea Dye Oxide Ink
- Next, add a couple of layers under your sentiment, I went for one red edged piece of Coconut White Card and one Antique Gold Pearl Card to match in with my base layers to the card, and the canvases. - Finish off with a few gems...
Thank you all for reading today's post, I hope it has inspired you a little. Jamie x Please Don't forget to share your creations with us on the group... Create With Craftmania and Jamie Rodgers | Facebook
Craftmania Shopping List -
PRODUCTS
Card Stock...
Tools...


Love this Jamie never thought if using the tea folding stamps for the canvases they work lovely 😊